In this tutorial, I will show you how to connect their photo sharing app example app to our Foodgram template in Adobe XD.
A) Create backend in backendless
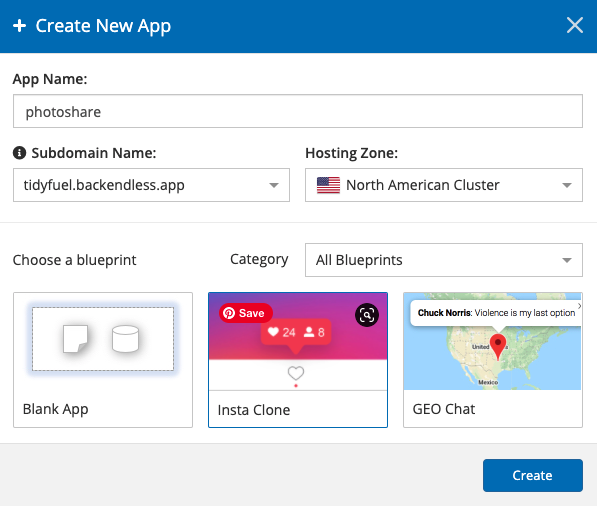
- Signup to Backendless and create an app called 'Photoshare' and select the insta clone blueprint before clicking on create.
- You should now be in your Backendless dashboard. Next up, we need to get the BASE URL of all the APIs of your project. The way to do this is to add **/api **to your subdomain. In this instance, the BASE URL becomes https://vividbeginner.backendless.app/api.

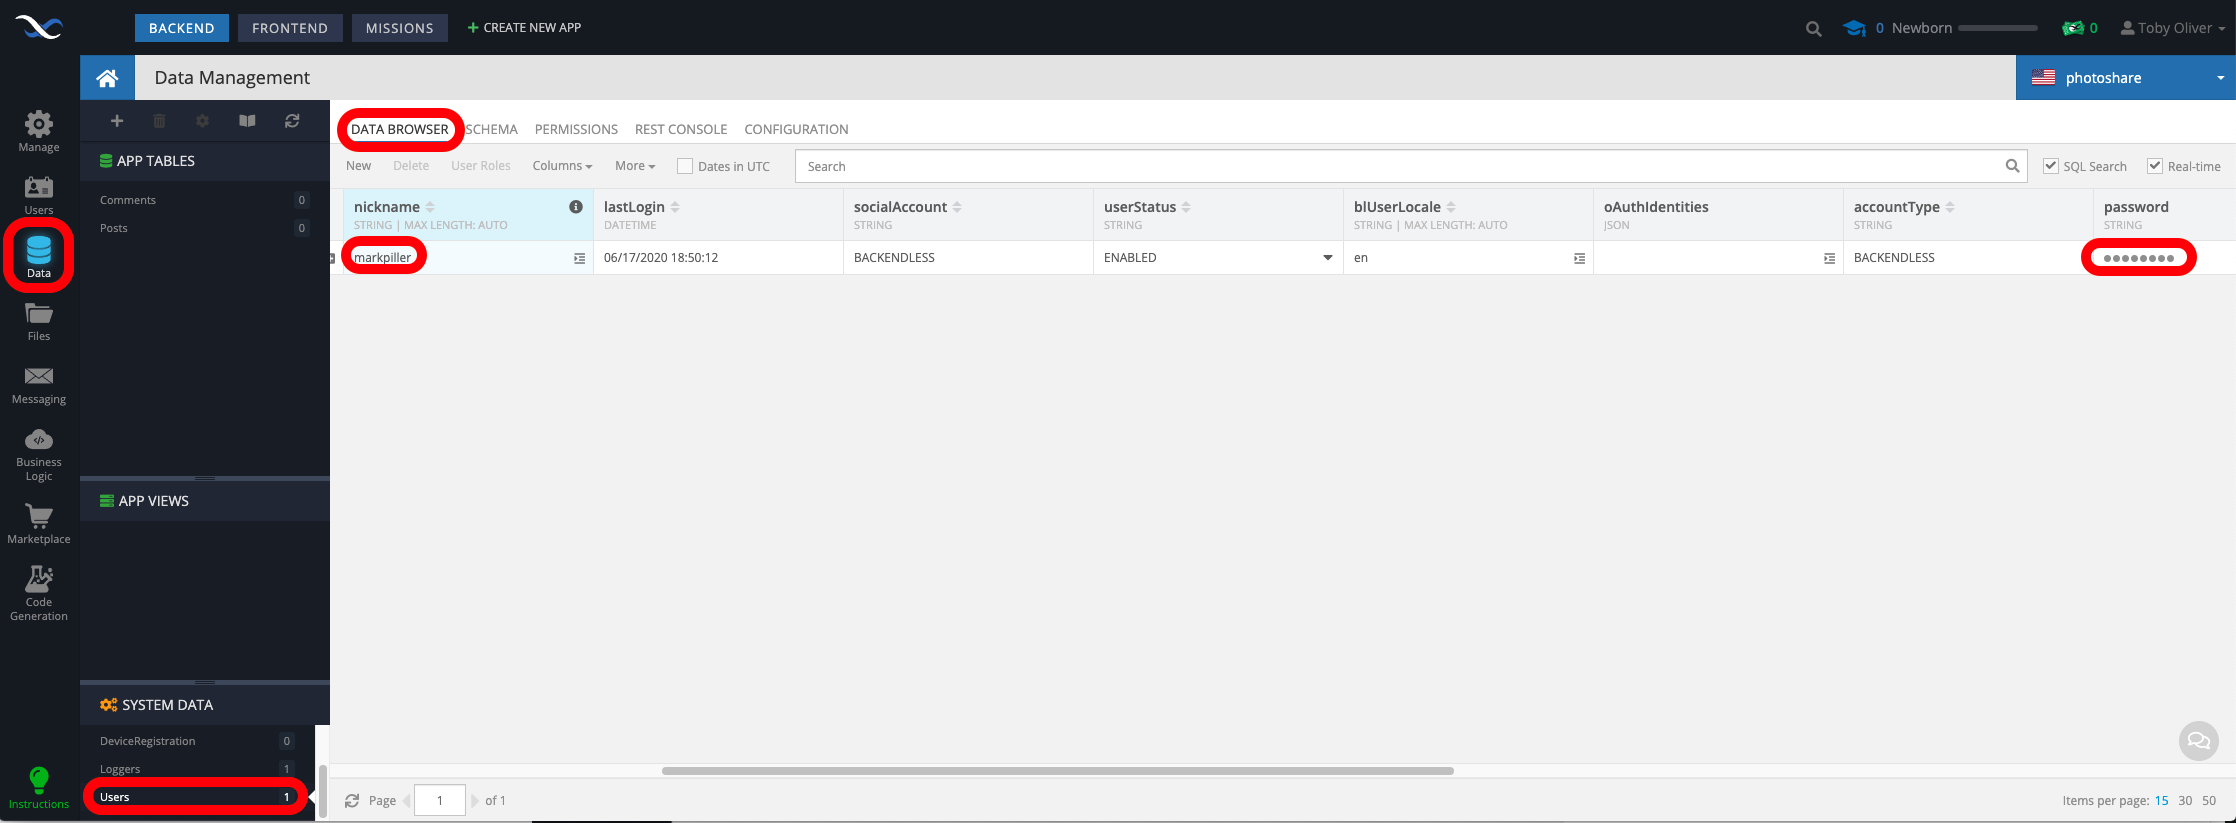
- Although Backendless has now set us up with a test user, we need to reset the password. Go to the Data Tab and click on the Users table in System Data, then click on Data Browser and then change the user nickname to be testuser and the password field to be backendless and hit enter to confirm (you might need to scroll across).
- Finally we need to get an API key to set up the APIs. Click on the Business Logic tab and then API Services and finally click on Login. A window will pop up where you can type the username: testuser and password backendless (that you setup earlier) to login.
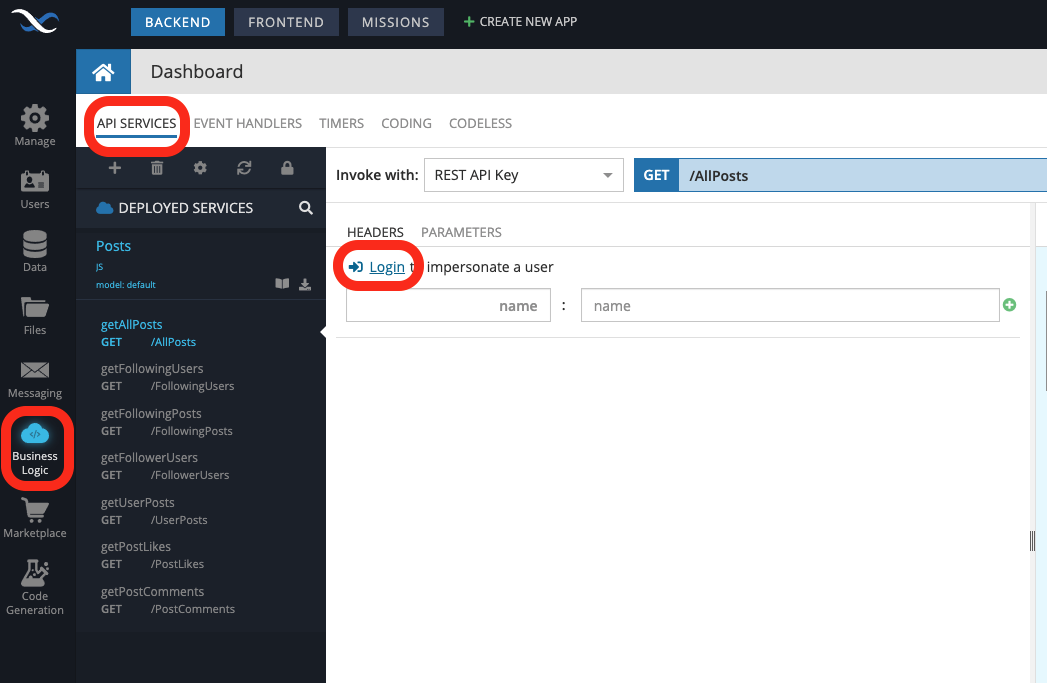
Once you have logged in, copy the user-token and paste it somewhere as we will need it later for the APIs.

You now have all you need to setup Bravo! 👏🏼
B) Set up the design in Bravo
Signup for Bravo — https://projects.bravostudio.app/signup
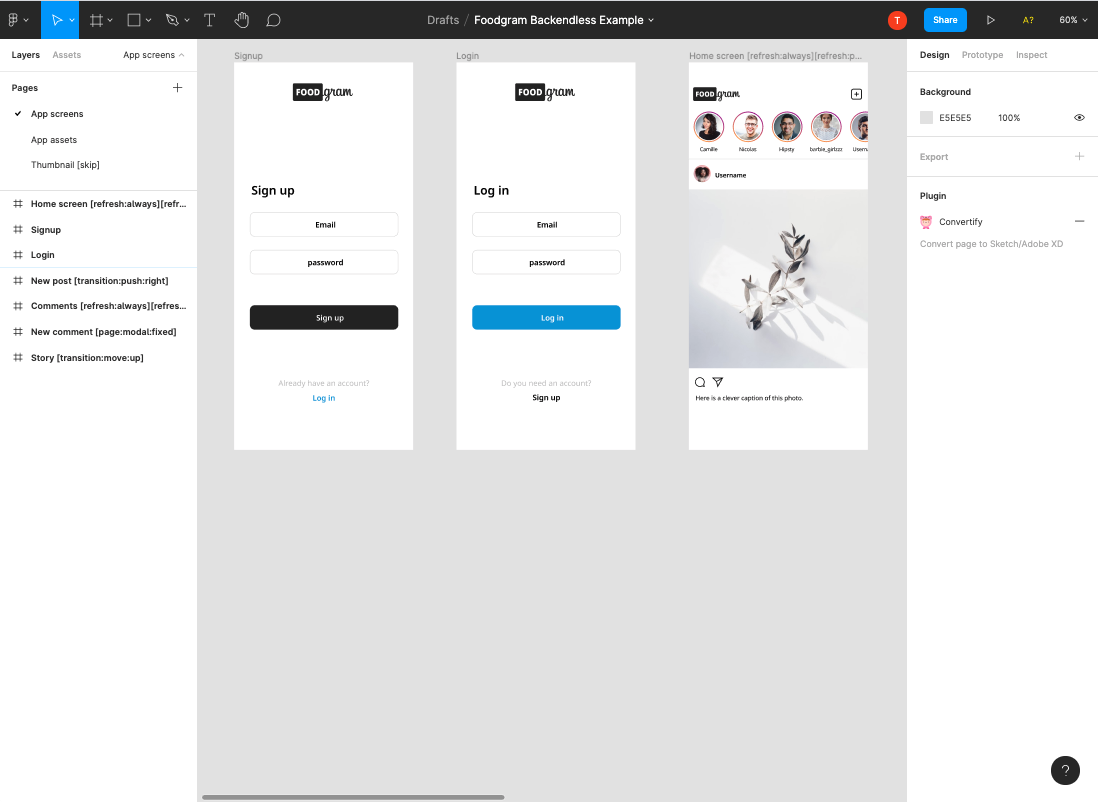
Open this Figma file and duplicate it: https://www.figma.com/file/Tbb5JoZiFPUWwtR49v1ekH/Foodgram-Backendless-Example
Import your version of the Figma file into Bravo.
C) Set up the APIs in Bravo
We need to add all the API requests that we need from Backendless in Bravo:
1.Click on Data Library in Bravo on the left-hand side
2.Click on New Collection
3.Click on ‘Custom API’ and Name it Foodgram with Backendless
4.Click on the + button next to Requests to add a new request for each of the following 6 requests (NB the
- Signup
Name: Signup Type: POST Request URL:
- Login
Name: Login Type: POST Request URL:
Once you have inputted the above, hit the blue send button for this request to get sample data to allow the received data to be set up for this request.
Make sure the .data.user-token field is ticked and then, in the Selected Data tab, change the field’s name to user-token. We can reference this name as a variable in other requests to allow the request to pass authentication.
- Add post
Name: Add post Type: POST Request URL:
- Get all posts
For this step we will need the user token from step (A) 4, to enable us to highlight the data we need.
Name: Get all posts Type: GET Request URL:
Once you have inputted the above hit the blue send button for this request to get sample data to allow the received data to be setup for this request.
Make sure the following fields are ticked in the Received data pane , .data[], .data[].objectId, .data[].description, .data[].image. Then change the name of the .data[].objectId field to post-id** **in the selected data pane. (NB this name post-id needs to be consistent, i.e. not post_id throughout the queries as its is used by the app to reference the particular post for comments etc).
Also copy the data for the .data[].objectId that is in the response and paste it somewhere as we will need it in the next step.
- Add comment
Name: Add comment Type: POST Request URL:
Once you have inputted the above, hit the blue send button for this request to create a test comment to help with the comment setup.
- Get post comments
Name: Get comments for a post Type: GETRequest URL:
Once you have inputted the above hit the blue send button for this request to get sample data to allow the received data to be setup for this request.
Make sure the following fields are ticked in the Received data pane, .data.comments[], .data.comments[].objectId, .data.comments[].text.
Now all the APIs are now setup in Bravo and we just have to connect them to the design.
D) Bind the APIs to the design in Bravo
Now that we have the APIs in Bravo the last step is to connect them to the app design. Go into the Foodgram with Backendless app in Bravo so you can see all the screens.
- Signup
Click on the Signup screen to edit the binding for this screen, choose the Foodgram with Backendlesscollection, and then the signup request
In the Select Visual Elements list Click on the username element and connect it to login in the binding panel on the right-hand side in the Content Destination section. This will bind the input field to this variable which will be used in the request.
Click on the password element and connect it to the password in the binding panel on the right-hand side
Change Response Actions — on success to Go to Page — Login.
Change Response Actions — on failure to Show Alert with the text ‘Signup Failed’
- Login
Click on the Login screen to edit the binding for this screen, choose the Foodgram with Backendless collection, and then the login request
In the Select Visual Elements list Click on the username element and connect it to login in the binding panel on the right-hand side in the Content Destination section. This will bind the input field to this variable which will be used in the request.
Click on the password element and connect it to the password in the binding panel on the right-hand side
Change Response Actions — on success to Go to Page — Home Screen.
Change Response Actions — on failure to Show Alert with the text ‘Login Failed’
- Home Screen
Click on the Homescreen to edit the binding for this screen, choose the Foodgram with Backendlesscollection and then the Get all posts request
In the Select Visual Elements list Click on the Post list element and connect it to Data in the binding panel on the right-hand side. This will repeat this container element for all the items in the list, so we can bind the content for each item.
Click on **image element and connect it to the image in the content binding.
Click on **caption element and connect it to Description in the content binding.
- New Post screen
Click on the New Post screen to edit the binding for this screen, choose the Foodgram with Backendlesscollection and then the Add Post request
In the Select Visual Elements list Click on the **image upload element and connect it to the image_url field in the binding panel on the right-hand side in the Content Destination section. This will bind the input field to this variable which will be used in the request.
Click on the **caption element and connect it to the caption in the binding panel on the right-hand side
Change Response Actions — on success to Go to Page — Home screen.
Change Response Actions — on failure to Show Alert with the text ‘Upload Failed’
- Comments screen
Click on the Comments screen to edit the binding for this screen, choose the Foodgram with Backendlesscollection, and then the Get comments for a post request
In the Select Visual Elements list Click on the Comment list element and connect it to Comments in the binding panel on the right-hand side. This will repeat this container element for all the items in the list, so we can bind the content for each item.
Click on **caption element and connect it to Comments Text in the content binding.
- New Comment Screen
Click on the New Comment screen to edit the binding for this screen, choose the Foodgram with Backendlesscollection and then the Add Comment request
In the Select Visual Elements list Click on the **comment element and connect it to the comment field in the binding panel on the right-hand side in the Content Destination section. This will bind the input field to this variable which will be used in the request.
Change Response Actions — on success to Go to Page — Comments.
Change Response Actions — on failure to Show Alert with the text ‘Comment Failed’
Testing
You should now be able to test your app in Bravo Vision, signup, and then log in and add images and comment on them.
As you add content, you can check if it's working by looking at the tables in Backendless.
Have fun, and let us know if you get stuck.
The Bravo Team